How to create a private Oauth2 consumer in Bitbucket
Intro
I was trying to follow these directions (they may be updated by the time you read this), which state the following:
In the Apps and Features section, choose OAuth consumers, and then choose Add consumer.
Enter a name for your consumer, for example, Amplify Integration.
Enter a callback URL. Although this field is a required input, it’s not used to complete the integration so the value could be http://localhost:3000
Check the box for This is a private consumer.
Choose the following permissions:
Project – Read
Repositories – Admin
Pull requests – Read
Webhooks – Read and Write
Leave the default choices for all the other fields and choose Submit.
Record the key and secret that are generated.
There’s similar documentation out there that mentions creating a private consumer, and it’s not clear how to actually do that. The new menu options make all those docs outdated. Here’s what I’ve found:
- To create an OAuth consumer, you have to actually go to
Apps and Features > OAuth clients > Create OAuth client. - To enter a callback URL, you have to select the
Authorization codegrant type checkbox under theAuthorizationtab when creating the client - To make this client a private consumer, you also have to select the
Client credentialsgrant type checkbox under theAuthorizationtab when creating the client.- If you don’t select this, you’ll get the following error:
Cannot use client_credentials with a consumer marked as \"public\". Calls for auto generated consumers should use urn:bitbucket:oauth2:jwt instead.
- If you don’t select this, you’ll get the following error:
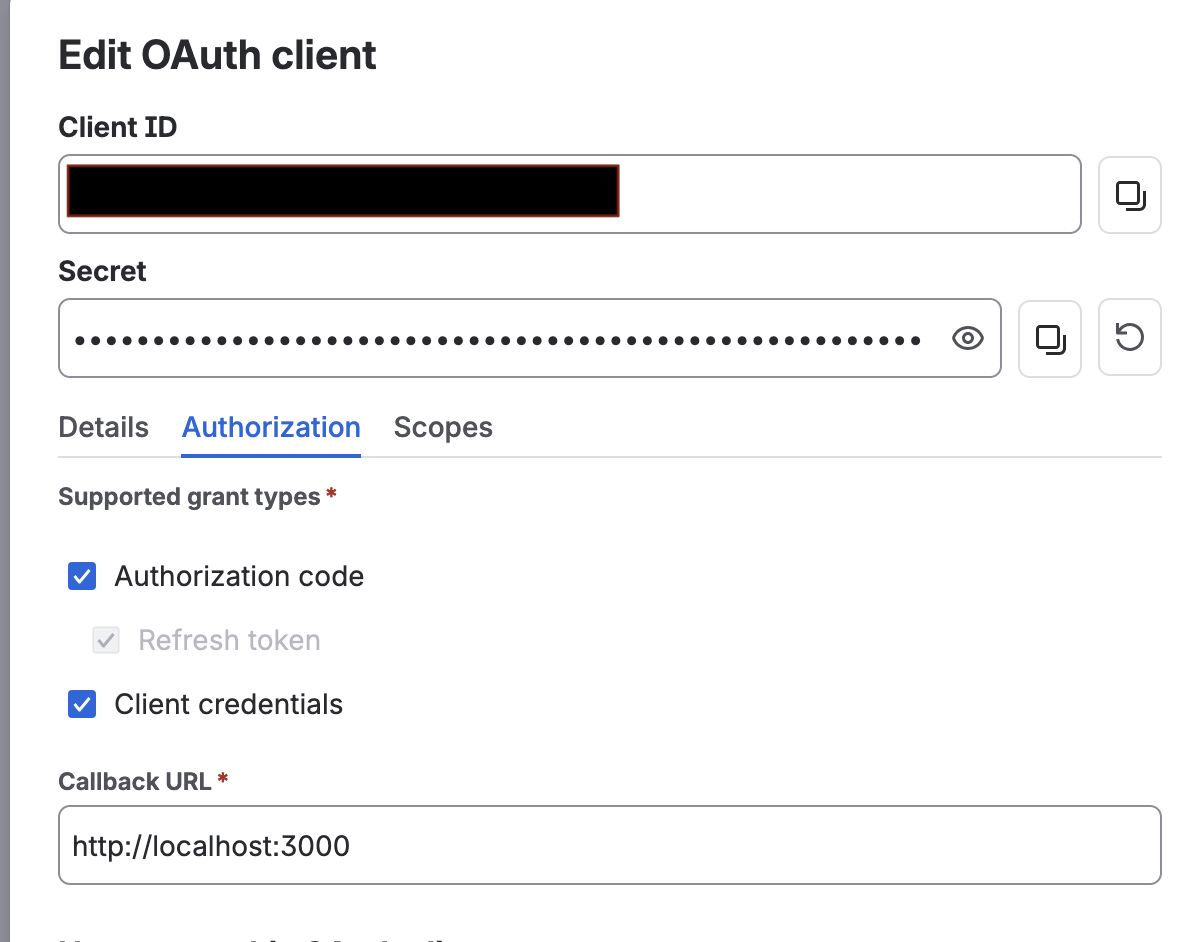
Hope that helps.